Introduction to Joint Art
Joint art is the creative practice of rolling cannabis into unique and often elaborate shapes and designs. It's a fun way to add a personal touch to your smoking experience, whether for special occasions or to impress friends. This guide will introduce you to the basics of making joint art, inspiring you to turn your next joint into a masterpiece.
The Artistry of Rolling
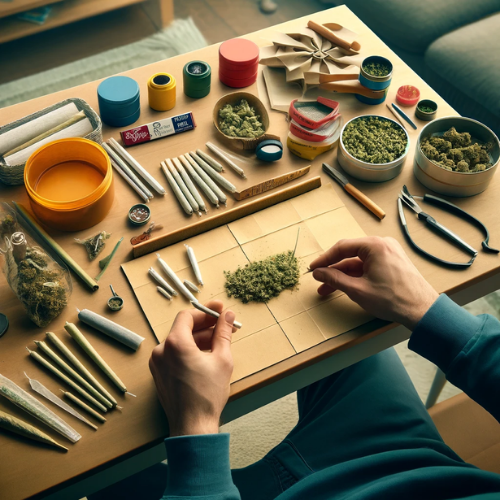
Crafting joint art requires patience, skill, and a bit of creativity. From simple designs like a cross joint to more intricate shapes like braids or spirals, the possibilities are nearly endless.
Materials Needed for Joint Art
- Cannabis: A good amount of ground cannabis.
- Rolling Papers: Various sizes, including extra-large or specialty papers.
- Rolling Tips/Crutches: For structural support in your designs.
- Scissors: For trimming and shaping the papers.
- Sticky Tape or Gum Strips: From rolling papers to help bind pieces together.
- Tweezers and Toothpicks: For delicate adjustments and placements.
Basic Joint Art Designs
The Cross Joint
- Roll Two Joints: One larger and thicker, the other smaller.
- Make Holes: Carefully create holes in the middle of each joint.
- Connect: Insert the smaller joint through the hole in the larger one, creating a cross shape.
- Seal the Gaps: Use gum strips to seal any gaps where the two joints intersect.
The Braided Joint
- Roll Three Slim Joints: Ensure they are even in size.
- Braid: Carefully braid them together, keeping the structure intact.
- Bind the Ends: Use a gum strip or extra rolling paper to secure the ends.
The Tulip Joint
- Create the Base: Roll a large cone-shaped joint for the flower base.
- Form the Tulip Bulb: Attach a bulb-shaped top, filled with ground cannabis, to the cone base.
- Secure the Structure: Use rolling paper strips to tightly secure the bulb to the base.
Advanced Techniques and Tips
- Patience is Key: Take your time with each step to ensure structural integrity.
- Even Burning: Focus on creating designs that will burn evenly.
- Practice: Start with simpler designs and gradually progress to more complex creations.
Legal and Safety Considerations
- Responsible Consumption: Always consume cannabis responsibly and within legal guidelines.
- Respect Local Laws: Be aware of and adhere to the cannabis laws in your area.
Conclusion
Joint art combines the pleasure of cannabis with the joy of creation. Whether you're a seasoned roller or just starting out, creating joint art can be a rewarding and fun experience. Remember, practice makes perfect, and the only limit is your imagination. For more information on joint rolling and cannabis artistry, especially in Los Angeles, visit atriumstore.com.